React Canvas로 폭죽 효과 만들기
이 글은 2021년 5월 1일에 작성되었습니다.
최근 Canvas에 관심이 생겨 뭐라도 따라 해 봐야겠다는 생각을 했습니다. 그러던 중 캔버스의 좋은 예제를 찾게 되었고 해당코드를 react로 변경해 보면서 캔버스의 전체적인 틀을 이해해 보는 시간을 갖게 되었습니다.
코드를 공개해 준 김병찬 님께 감사의 인사를 드립니다.
공개된 코드를 기반으로 폭죽 배경을 Canvas로 그려봤습니다.
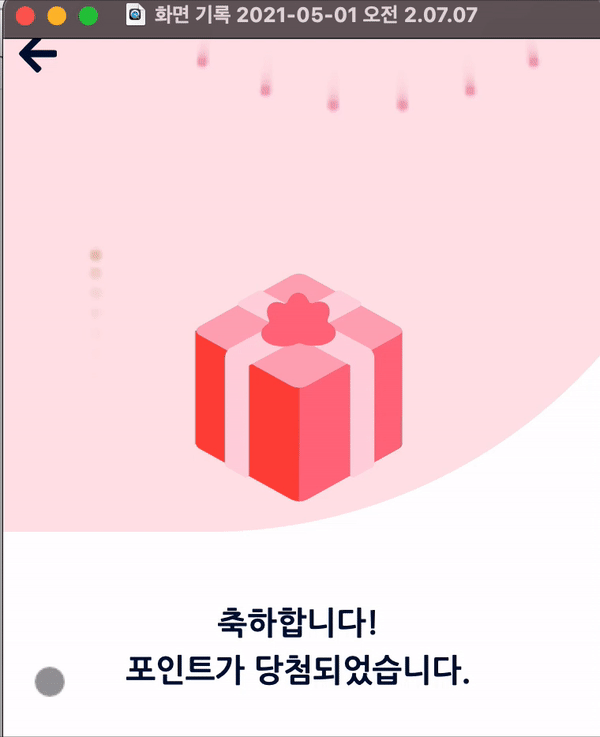
1. 선이미지와 텍스트 그리고 배경색은 Html과 CSS로 간단하게 만들고 해당 페이지의 canvas 태그를 쓰고 해당 캔버스를 useRef로 참조합니다.
import React, { useEffect, useRef, useState } from "react";
import Firecracker from "../../components/Firecracker";
import Firework from "../../components/Firecracker/Firework";
import Vector from "../../components/Firecracker/Vector";
import giftbox from "../../images/gift.svg";
import styled from "styled-components";

export default function BanefitType({ history }) {
  const canvas = useRef(null);
  const [firecracker, setFirecracker] = useState(null);

  useEffect(() => {
    const ctx = canvas.current.getContext("2d");

    const firecracker = new Firecracker(ctx);

    function createFirework() {
      const firework = new Firework(new Vector(ctx.canvas.width * Math.random(), ctx.canvas.height));
      firecracker.entityManager.addEntity(firework);
    }

    createFirework();
    setInterval(() => {
      createFirework();
    }, 600);
    firecracker.play();

    setFirecracker(firecracker);
  }, [canvas]);

  return (
    <>
      <Styledbenefit>
        <section className="header">
          <div className="headerBack">
            <div style={{ position: "relative" }}>
              <StyledCanvas>
                <canvas ref={canvas} height={200} />
              </StyledCanvas>
              <img src={giftbox} style={{ position: "absolute", zIndex: "2", top: "-0vh" }} alt=""></img>
            </div>
          </div>
        </section>
        <section className="page main">
          <div style={{ fontSize: "20px", fontWeight: "bold", marginBottom: "4vh" }}>
            <div>축하합니다!</div>
            <div>포인트가 당첨되었습니다.</div>
          </div>
        </section>
      </Styledbenefit>
    </>
  );
}

const StyledCanvas = styled.div`
  canvas {
    width: 100%;
    position: absolute;
    opacity: 0.5;
  }
`;
const Styledbenefit = styled.div`
  width: 100vw;
  height: 100vh;
  position: fixed;
  display: flex;
  flex-direction: column;
  justify-content: center;
  align-items: center;
  /* 태그 공통 속성  */
  section {
    display: flex;
    flex-direction: column;
    justify-content: center;
    align-items: center;
  }
  div {
    width: 100%;
    display: flex;
    flex-direction: column;
    justify-content: center;
    align-items: center;
  }
  button {
    width: 100%;
    height: 7vh;
    margin-bottom: 2vh;
    border: none;
    font-weight: bold;
    color: white;
    outline: none;
  }
  // 헤더
  .header {
    color: #000f34;
    width: 100%;
    .headerBack {
      width: 139%;
      height: 40vh;
      background-color: #ffc6ce;
      border-bottom-right-radius: 1000px;
      .pangimg {
        position: absolute;
        z-index: 1;
        width: 100vw;
        top: -10vh;
      }
    }
  }
  // 메인
  .main {
    color: #000f34;
    width: 80%;
    height: 60vh;
  }
`;
2. 캔버스가 페이지에 마운트 되면 Firecracker객체를 연결합니다.
캔버스를 호출하는 play()와 각 각의 폭죽을 그리기 위한 onEnterFrame()을 작성했습니다.
//Firecracker/index.js
import EntityManager from "./EntityManager";

export default class FirecrackerCanvas {
  handleRequestFrame = null;
  entityManager;
  constructor(context) {
    this.context = context;
    this.entityManager = new EntityManager();
  }

  play = () => {
    this.handleRequestFrame = requestAnimationFrame(this.onEnterFrame.bind(this));
  };

  onEnterFrame = () => {
    this.entityManager.update();
    this.entityManager.render(this.context);
    this.handleRequestFrame = requestAnimationFrame(this.onEnterFrame.bind(this));
  };
}
3. EntityManager 폭죽이 그려질 캔버스의 배경을 관리하고 각각의 폭죽을 담아내는 그릇 역할을 합니다.
addEntity() 폭죽을 캔버스에 추가하고 removeEntity()는 폭죽을 캔버스에 제거합니다. render()는 캔버스의 배경과 모양을 설정합니다.
//  Firecracker/EntityManager.js
export default class EntityManager {
  static instance;

  static addEntity(entity) {
    EntityManager.instance.addEntity(entity);
  }

  static removeEntity(entity) {
    EntityManager.instance.removeEntity(entity);
  }

  constructor() {
    EntityManager.instance = this;
  }
  entities = [];

  update() {
    for (let i = 0; i < this.entities.length; i++) {
      this.entities[i].update();
    }
  }

  render(context) {
    context.beginPath();
    context.fillStyle = "rgba(255, 255, 255, 0.5)";
    context.fillRect(0, 0, context.canvas.width, context.canvas.height);
    context.fill();
    for (let i = 0; i < this.entities.length; i++) {
      this.entities[i].render(context);
    }
  }

  addEntity(entity) {
    this.entities.push(entity);
  }

  removeEntity(entity) {
    const entityIndex = this.entities.indexOf(entity);

    if (entityIndex > -1) {
      this.entities.splice(entityIndex, 1);
    }
  }
}
4. 폭죽 한 개를 그리기위한 코드를 작성합니다.
createRandomColor()로 폭죽의 색상을 랜덤으로 설정되게 합니다. createFireworks()에서는 폭죽의 각도, 속도, 터지는 범위 등을 설정하고 update()에서 폭죽을 생성하고 지워지게 합니다.
// Firecracker/Firework
import EntityManager from "./EntityManager";
import Time from "./Time";
import Vector from "./Vector";

const PI2 = Math.PI * 2;

function createRandomColor() {
  const r = Math.round(Math.random() * 120) + 120;
  const g = Math.round(Math.random() * 120) + 120;
  const b = Math.round(Math.random() * 120) + 120;
  return `rgb(${r}, ${g}, ${b})`;
}

function sleep(ms) {
  return new Promise((resolve) => {
    setTimeout(() => {
      resolve();
    }, ms);
  });
}

export default class Firework {
  angle;
  speed;
  radius;
  color;
  velocity;
  isBurst = false;
  constructor(position) {
    super(position);

    this.angle = -Math.PI * 0.5;
    this.speed = Math.random() * 15 + 25;
    this.radius = Math.random() + 1;
    this.velocity = Math.random() * 15 + 5;
    this.color = createRandomColor();
  }

  createFireworks(speed, size = 50) {
    const angle = PI2 / size;
    const velocity = 10;
    const color = this.color;

    for (let i = 0; i < size; i++) {
      const firework = new Firework(new Vector(this.position.x, this.position.y));

      firework.angle = angle * i;
      firework.isBurst = true;
      firework.speed = speed;
      firework.velocity = velocity;
      firework.color = color;
      firework.radius = this.radius;

      EntityManager.addEntity(firework);
    }
  }
  async update() {
    const speedVelocity = this.speed * this.velocity * Time.delta;
    this.position.x += Math.cos(this.angle) * speedVelocity;
    this.position.y += Math.sin(this.angle) * speedVelocity;
    this.velocity *= 0.98;

    if (!this.isBurst && this.velocity <= 1) {
      this.isBurst = true;

      this.createFireworks(16, 30);
      await sleep(150);
      this.createFireworks(12, 20);
      await sleep(150);
      this.createFireworks(10, 10);
    } else if (this.isBurst) {
      this.position.y += this.speed * Time.delta + 0.98;
      this.position.y *= 1.0005;

      if (this.velocity <= 1) {
        EntityManager.removeEntity(this);
      }
    }
  }
  render(context) {
    context.beginPath();
    context.fillStyle = this.color;
    context.arc(this.position.x, this.position.y, this.radius, 0, PI2);
    context.fill();
  }
}
5. 시간을 설정하는 Time의 코드입니다.
// Firecracker/Time.js
export default class Time {
  static delta = 0;
  static startTime = 0;

  static start() {
    Time.startTime = Date.now();
  }

  static update() {
    const currentTime = Date.now();
    Time.delta = (currentTime - Time.startTime) * 0.001;
    Time.startTime = currentTime;
  }
}
이 번 글을 준비하면서 React에서도 충분히 캔버스로 멋진 효과를 줄 수 있고 Canvas를 제대로 다룰 수만 있으면 FE 영역에서 더 넓은 시야를 가지를 있다는 것을 알게 되었습니다.
저도 캔버스 잘.. 써보고 싶네요!!